Tuesday, January 31, 2012

Party Prizes

Ok, so I started this blog by showing the banners I made for Zachary's birthday and I promised that when I got more things finished for his birthday that I would post them. While I'm not done with them yet, (I've got 16 more to go!) these are the "ribbons" for the winners of the games. I'm also toying with the idea of putting them in the goody bags or decorating the goody bags with them. I also still need to go the craft store and get some pins so they can attach to the recipients shirt. :)
These are the supplies to make one ribbon or medal or whatever you want to call it :) I cut the "Piston Cup" with my Cricut Expression using the Disney Cars cartridge. I punched the scallops using my EK Success scallop layering punch. I cut the red strips from an 8.5x11 piece of Recollections card stock long ways at 3/4in. and then cut the strip in half and cut a triangle out of the bottoms. I cut the black strips (also Recollections card stock) and 2in. and edge punched them with my Martha Stewart Zig Zag edge puncher. I scored at every 1/2 in.


I accordion folded the black strips.
Then I glued the ends together with Aleene's tacky glue (my favorite for this kind of project) so that it makes a circle.
Then I laid it flat (edge punched side out) and used the big scallop to glue it flat. This will be the back.
I flipped it over and glued the small scallop to the center for added stability. Then I used Elmer's glue dots to adhere the Piston cup to the top.
I also used the glue dots to adhere the red "ribbons" to the back of the rosette.
As an after thought I used a fine tipped black Sharpie to add the "#1" and "Piston Cup." I like it better than when it was plain. :)

Here are the four I have finished. Hopefully I will get some more done during nap time tomorrow! :) Thanks for looking! :)

Finger Paint 12x12 Scrapbook Layout

Hi, all. I have another few projects to share with you. :) First off is another layout for my sons scrapbook.
I have been looking at so many sketches lately that I think I mashed up a few when I did this layout. ;)
I hadn't done layouts in awhile and just recently started back up again. I started to get burned out, and I wasn't liking any of the ones I had completed (remakes to come.) So I stepped away from making them for a while and focused on cards. Now I'm getting back into the groove of layouts. :)

I used my Making Memories Slice and the Bon Appetite card to cut the title. I love how the font looks like it was "painted." Lol. :) I've also started to do a lot more handwritten things instead of typing them and printing them out.
The ribbon is American crafts. All the patterned paper is DCWV. I used the Martha Stewart edge punch "loops" to make the edge on the green polka dot paper. And I used the EK Success scallop edge punch with diamonds (you can't see the diamonds in this particular instance) to edge the tan paper. The alpha stickers are old DCWV.
Again, I hand wrote the journaling on yellow polka dotted DCWV paper.

This page is about my son finger painting (duh lol) for the 2nd time. The first time we let him do it in the garage so he could crawl around...bad idea! It was everywhere! To this day there are still red hand prints on the garage floor. :) The second time I thought I would put him in his high chair and let him paint that way...not so good either! As you can see he tried to eat it. He was so silly, but he had fun and I have some of his own artwork, so it was totally worth it! :)

Monday, January 30, 2012

Stuck, 12x12 Scrapbook Layout

This is a quick layout I did today for Zachary's scrapbook. I'm on the 5th or 6th book by now, yikes! :) I used an old Sketchy Thursdays sketch for this one. Here it is...
I like that it's clean and simple and I only had the one photo, so it was perfect. :)
I used to type all my jounaling on the computer and pick a cute font to print it out in, but lately I've been seeing a lot of handwritten journaling. I thought, you know what? I don't have much handwriting in all these books and pages I've done. I treasure things that have my mom's or grandma's handwriting on them, so even though Zac is a boy, he may still want to have my actual handwriting on some things. :) PS: I cut the shape with my Cricut Expression using the Elegant Edges cartridge, and the buttons are Studio G. :)


The string is old from my stash and all the patterned paper is DCWV. O, and I cut the title with my Making Memories Slice using the Wedding card. Love that font. :)

Love

So I made this card for the Clean and Simple stamping challenge (http://cleanandsimplestamping.blogspot.com/)
I am obsessed with their sketches plus I have found a TON of crafting blogs that I like to follow from this blog. I just like the idea of clean and simple. Although I do love the intricate layering and tons of embellishing look to some cards (they are extremely pretty to look at) I'm just not very good at that style. In fact, I suck at it. :) So when I found this blog I was in heaven, just my style! :) Here is the sketch...
Clean, simple, and pretty right? So here is the card I came up with...
The patterned paper is from the Recollections Seasonal stack. The stamp is Studio G ($0.97 at Wal Mart! Yay!) The card stock, including the base of the card itself, is also Recollections.

I used my Making Memories Slice and the Basic 1 card that came with it to cut the hearts (at 1 1/2 I think.) I embossed the stamp with three different colors of embossing powder (copper, purple, and green) then I fussy cut them out and used Elmer's Craft glue dots to adhere them to the hearts. I used Scotch brand pop up foam squares to give the hearts a 3-D effect. I love these foam squares because they go flat so you can put the card in an envelope and then pop back up when the recipient takes the card out of the envelope. :)
I used my Making Memories Slice again, this time with the Words and Expressions Holiday card to cut out the word love. I rolled the die cut through my little Xyron Sticker maker and adhered it to the top corner of the card. :)
So that's my card project for the Clean and Simple Stamping Challenge. Hope you like it! :)

Streamers

This year the studio I work for, Divine Dance Academy, is doing The Wizard of Oz for our end of year recital so all of the classes are going all out. I told my friend and fellow teacher that I would make streamers for her girls to dance with (it's one of her little 5-6 year old Ballet/Tap Combo classes. So cute!)
These are my supplies. Ribbon in mint green, white, and lavender. They match the costume the girls will be wearing. Also some thin wooden dowels.


I also used my Mom's old trusty hot glue gun. She gave it to me a couple weeks ago because I still haven't been able to find mine :(

First, I hot glued the mint green ribbon to the top of the dowel. It is the widest of the three I bought.
 Then I glued the white ribbon on.
Then the lavender.
This is what all three of them look like glued on together.
I added some sparkle-y ribbon around the top to make all the ends come together.
I also put some glitter fingernail polish on the ends of the ribbons so they wouldn't come unraveled the more the girls used them. :) I've only made one so far to see if my friend likes them and can use them, but if she does, they really aren't hard to make at all. This one took me about 3 min!


Saturday, January 28, 2012

Brand New

Ok, so I'm a complete novice when it comes to this blogging stuff...I am going to try my best. ;)
I will try and post everyday, but odds are it's going to be every other day or so.
I promised if I got 15 people to like my "creating a blog" status on Facebook that I would create one, and start by showing the things that I am making for my son Zachary's 2nd birthday. Well it happened! :) So here goes... ;)


Excuse the toes ;) they are mine, ha ha! This is the first in a series of banners I made to hang (somewhere) in the house for Zac's party. This one is obviously the HAPPY in Happy birthday.

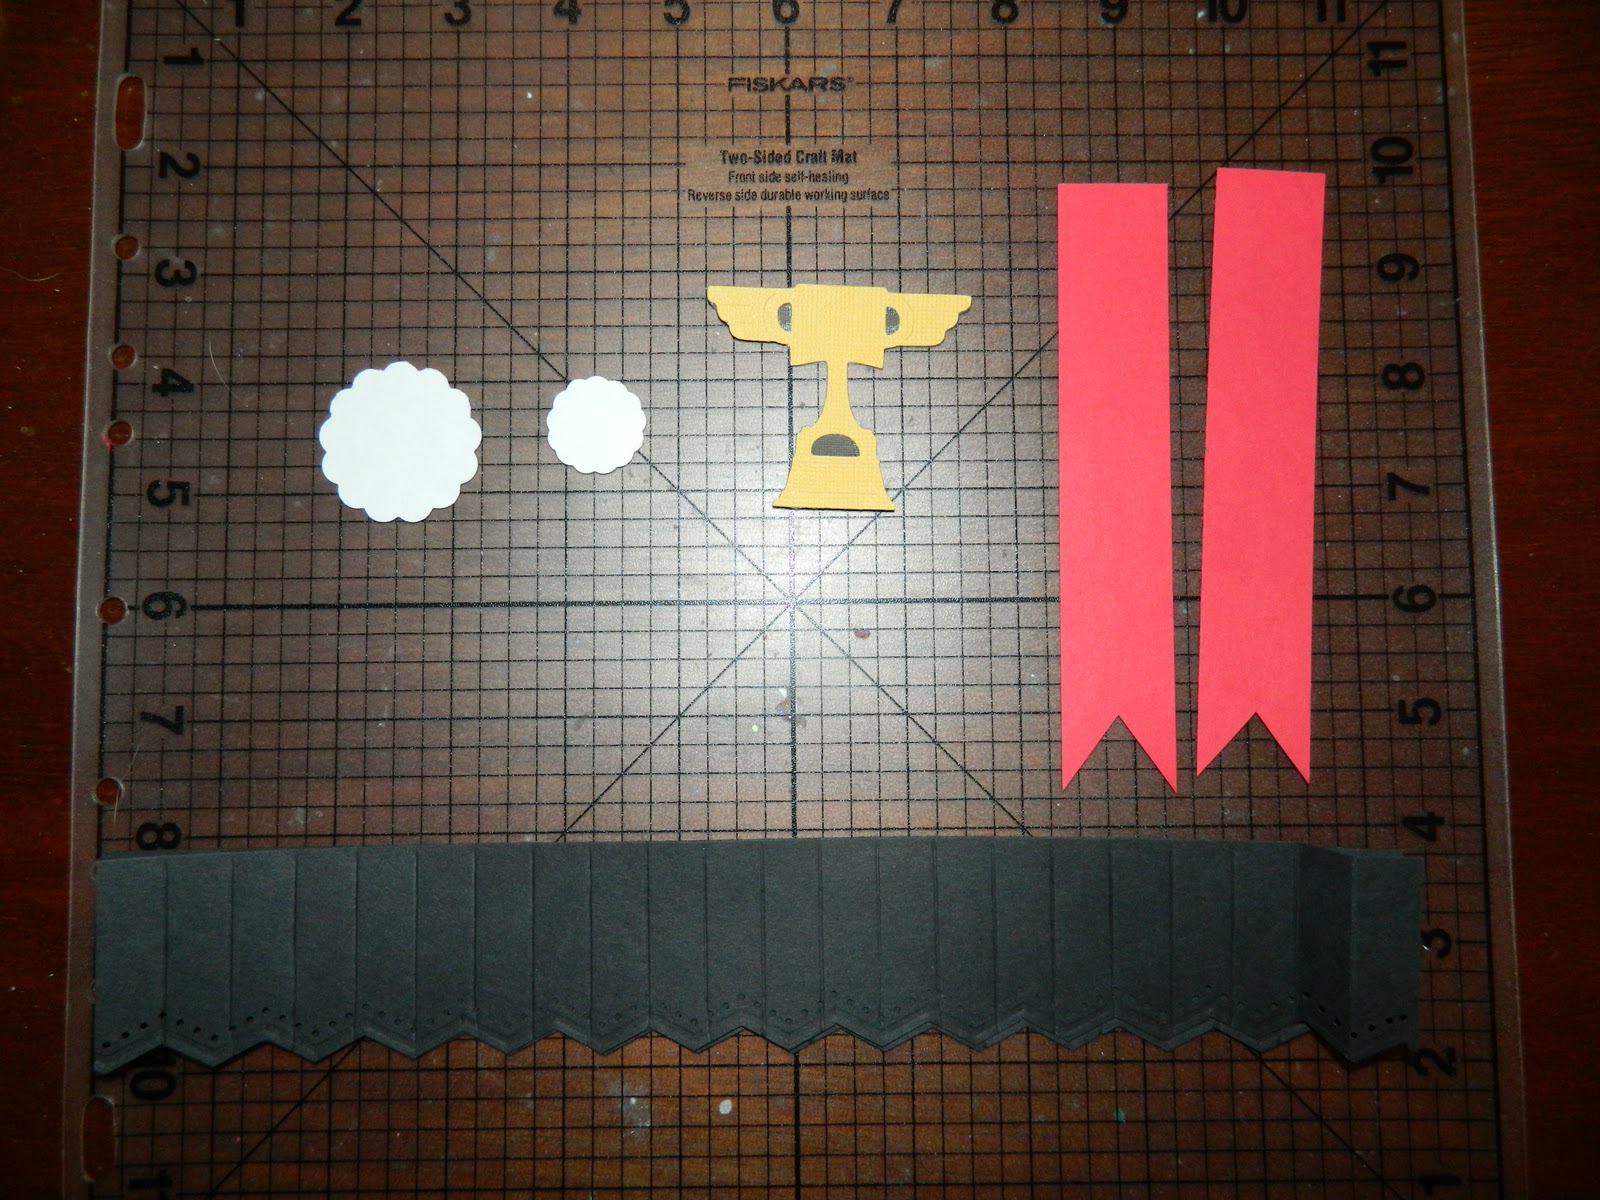
I used red, black, and white card stock from Recollections (Michael's brand) for the triangle banner shape, the rosette, the scallop in the middle, and the letters. I used my Cricut Expression to cut everything. (I LOVE my Cricut!) The letters were cut with the Cricut Classic Font cartridge and the banner shape was cut with the Calligraphy cartridge. I used my paper trimmer to cut an 8.5x11 piece of red card stock into 1.5 inch strips (long ways) then used my Martha Stewart scoring board to score every .5in and then accordion folded the strips. I glued two strips end to end and then together in a circle and pressed them flat to create the rosette. I used the layering scallop punch by EK Success for the scallop circle in the middle.

The Lightening McQueen and World of Cars images were also cut with my Cricut using the Disney Cars cartridge that my wonderful Mother-in-Law got me for Christmas. :)

Here are the rest of the banners. Put together they say "Happy 2nd Birthday Zachary."


Hope you like it. :) As I put together more decorations for the party I will post them here, and of course I will post pics from the party itself. :) Thanks for playing along! Have a wonderful weekend!